Knowing a few GoPro filming tips and tricks will help you a lot in getting the best out of your camera and shooting the best possible footage.
GoPro is the run-to brand for people who are looking for an action camera that will give them the best experience.
From stunning video qualities to good firmware with nice updates, GoPro cameras pack nearly all the features that constitute a perfect choice.
Using a GoPro camera can be tricky to a lot of people, especially beginners who are starting their action camera journey.
There is a lot of jargon that may even confuse an average person, things like frames per second, codec, time-lapse, and so on.
Recording your footage in a specific scene should match with the most appropriate settings in your camera.
Navigating through the different camera settings can be a confusing task.
Hence in this post, I will give you advice on how to shoot and what settings to use in the following 12 activities and scenes:
- Skiing and snowboarding
- Kayaking
- Diving and underwater
- Selfies
- Jumping shots
- Vlogging
- Travel
- Nature shots daytime
- Nature shots nighttime
- Night lapse
- Fireworks
- Sunsets
1- Using your GoPro for Skiing and Snowboarding
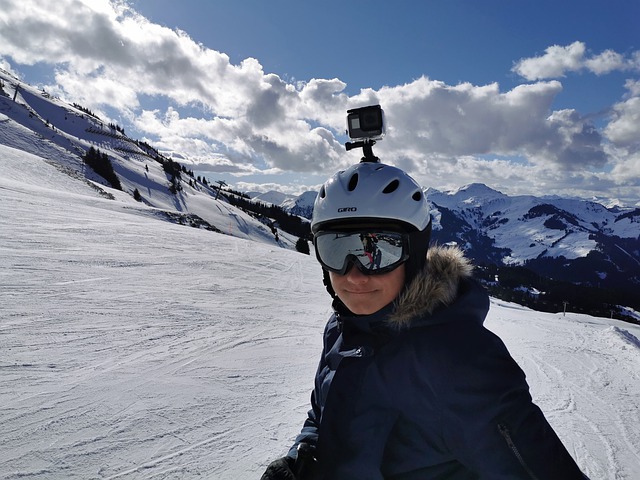
Skiing and snowboarding are rugged activities that require proper care when using any action camera.
Any slight mistake may lead to knocks that may cause serious damage to your camera.
To prevent such occurrences from happening, you need to make sure that your camera is firmly mounted on the desired place.
Suitable GoPro to Use
Make sure that you use a waterproof camera in this adventure. Starting with GoPro Hero 5, all succeeding GoPro models are waterproof. You will not need a waterproof housing in this case.
If you use any non-waterproof model, ascertain that you have included a waterproof housing to cover your camera.
I recommend using the Hero8 Black. The HyperSmooth 2.0 gives very steady and smooth footage alongside the stunning quality.
Connect your GoPro to the App
Before starting, connect your GoPro camera to your smartphone App. This will allow you to do several things including receiving the live feed.
Once you are done with filming your activity, the GoPro App will give you options to jolt around your footage.
You can edit the videos and overwrite the audio with free copyright-free music to give your video a more professional touch.
Afterwards, you can easily share the videos to your Instagram stories directly from within the App.
Navigating the GoPro Settings for Skiing and Snowboarding
With the more recent GoPro cameras e.g. Hero8 Black, you don’t have to worry much about the exposure at least during the day.
The auto-exposure mode in these models, getting stunning footage is what you are assured of without tweaking anything.
When it’s so cloudy and the sky is merely visible, you may find the need to fine-tune and increase the exposure.
If you choose to film in 360° with the GoPro Max 360 or Fusion 360, you will later have lots of options on what you can do to your videos.
Most importantly, you can reframe the video in the GoPro App and get a portion of any angle you may desire.
Field of View
Being on mountains and hills, there are a lot of scenic features that need to be captured in your video.
Do not think about your actions only, consider the all-round view of your skiing and snowboarding area, and choose the wide or linear field of view/digital lens.
This digital lens view is enough to get a good representation of your background without necessarily losing focus on you.
Also, when it comes to editing and post-production, this view gives you far-reaching footage that can easily be cropped without losing lots of details.
Frame Rate Choice and When to Use During Skiing
When it comes to filming intense actions like skiing, the higher the frame rates you use, the more smooth your footage will turn out.
60 frames per second is generally a good option to kick you off in skiing. However, to make the best out of your adventure, you need to tweak the frame rates.
Slow Motion
Go for 120 fps if you need to do a slow-motion video right within the camera.
If your GoPro model supports 240 fps, then that means you can get super slow-motion videos; up to 8 times slower.
For capturing slow-motion, I recommend using either 4K60, 2.7K120 or 1080p240.
I would personally stick to 2.7K at 120fps, which is the middle ground. I would also set the ISO between 100 and 200.
The higher the frame rate, the darker the image will become, this is something to keep in mind.
Using slow-motion is particularly stunning when filming with your friends from the ski level or using a selfie stick.
Using slow-motion mode will compromise the quality of your video, but not that much and you may even go without noticing that.
Capturing Photos
Skiing and snowboarding can be very interesting and filming makes it even better. One thing you need to keep in mind is to have some still photos from this adventure.
This is where Time Lapse mode becomes so useful, I always set mine to capture every five seconds. Doing this will give you photos in a more natural look, captured while racing with your pet on the skis or snowboard.
When filming a friend making crazy jumps with the ski or snowboard, use the photo burst mode for impressive results.
If you forgot to take any photos during your adventure, worry not because the GoPro App got you covered.
Use the frame grab option in the GoPro app to save photos directly from your footage.
Mounting your GoPro
Mounting your camera is key in making sure you reduce vibrations and shakings as much as possible.
Whichever mounting location you choose, make sure the screws are fastened properly and tight enough to keep the camera in place. (Not so tight to break the plastic in place).
There are three ideal mounting locations you may be interested in depending on the POV (Point of View) that you are looking for:
- Chest Mount – This is my most preferred mounting location for Skiing. Having your camera on the chest reduces the shakes and swings that are caused by a head mount or selfie stick use. However, I dislike chest mounting in snowboarding.
- Selfie Mount – This is a very nice option for snowboarding especially on solo trips. Just get more creative with the selfie stick and swing it around to get different view areas.
- Head (Helmet) Mount – This is a very ideal option when you want to film whatever your eye is seeing while skiing or snowboarding.
Whichever mounting option you use, always turn the image stabilization on if it’s supported by your chosen resolution and frame rate.
Which Accessories Can you Use?
Selfie Stick – I use the GoPro ElGrande for taking footage of myself when snowboarding, it is useful if you don’t have a 360-degree camera like the GoPro Max.
Camera Tether – Having this accessory is more of a safety measure. if the mounting on your camera breaks, the camera has a fallback option. Just make sure the tether strings are fastened nicely on a stable end.
Use Voice Control
If you have GoPro Hero5 and later models, always activate the voice command when filming in such adventures.
It is a nice way to control the camera when you’re hands are busy with the ski poles or holding a selfie stick when snowboarding.
2- Using your GoPro for Kayaking
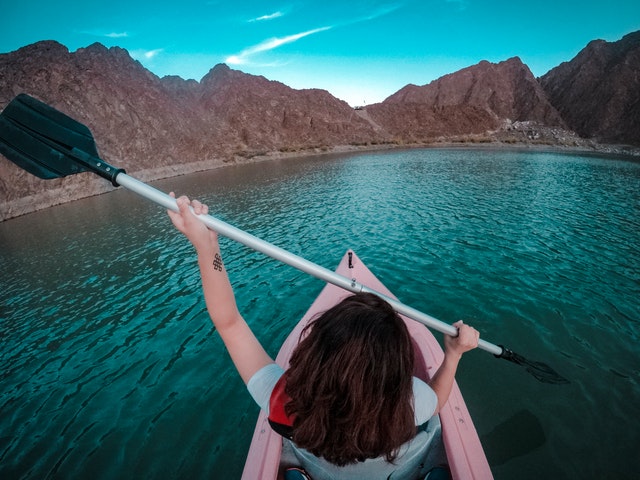
For you to get that perfect kayak footage and photos, you need to ensure you have checked the following conditions.
Pre-visit the Area Before the Big Day
If you don’t live around your kayaking area, it most definitely that you are not familiar with the place especially in terms of sunrise and sunset direction.
Although you can get such information directly from your smartphone, it’s good to go there physically and also note the water level and meanders.
When the kayak moves, just paddle gently when the water surface is calm to allow smooth footage and avoid sitting at a still place since the ripples will affect the reflections.
Is there Enough Lighting?
In most places, morning and evenings provide the best lighting conditions for kayaking.
On top of that, we have the sunrise and sunset during those periods. Shooting the sunrise/sunset and its reflection on the water surface will give you a stunning shot.
In low light conditions, you can consider having a light accessory to brighten up your shots. Also, mounting on the helmet provides a good option in such a situation.
Suitable GoPro to Use
This is not a battle for the best among all, rather, choosing the GoPro camera to carry with you in this expedition will depend on what you want to do.
I recommend considering both the Hero8 Black and MAX 360. Hero8 will give you higher resolutions resulting in impressive video quality while maintaining a standard look.
Using the GoPro MAX will give you a 360° footage which has more editing options than a standard video. When kayaking with your friends, it’s always nice to have a MAX do the shooting in SuperView mode to capture all the actions.
GoPro Mounting Accessories for Your Kayak
For the GoPro MAX camera, I find it best to mount it the kayak with a pole.
You can use the MAX Grip and Tripod from GoPro. One thing to ensure when using a pole is that it should be thin enough to guarantee a perfect camera alignment.
When using the Hero8 Black, I usually mount it on my helmet and let my hands do the kayaking.
Having your camera mounted on the chest may reduce the view angle because a good portion of your kayak will be in the close-up scene to the camera.
Capturing Photos
Always ensure that your lens is clean and dry, carry a lens cleaner with you.
If you are using the Hero5 Black or later camera models, it’s good that you take your photos in the RAW format since it will give you more editing options later on.
Tweak your lens to around -0.5 exposure compensation to allow your lens to get more details in low lighting conditions.
Voice Command & Time Lapse Photos
This is the best time to avoid pressing the shutter button at all costs.
More often than not, pressing this button will result in minor shakes which may result in blurred photos.
Make use of the voice control to command your GoPro to take photos or better still, use Time Lapse photos to capture shots in intervals. I always set mine to capture a shot every 5 seconds.
Hero8 Black Video Setting for Smooth Footage
It’s very easy to get a shaky video when mounting your camera to the helmet as I recommended.
Also, keep in mind that the camera lens will be recording whatever you are seeing and every head movement.
As such, it is important to keep your head straight and focus on what is important. Whenever you need to turn your head, do so slowly and gently having the camera in mind.
I use a video resolution of 2.7K at 60fps in an aspect ratio of 4:3.
HyperSmooth 2.0 should be turned on and keep the ISO at a minimum of 100 and a maximum of 400.
With an exposure compensation of -0.5, I am well assured of getting more details even when the lighting becomes darker.
Screengrabs with the MAX
Shooting a 360° footage with the GoPro MAX will give you editing options of screengrabs from 5.7K high-resolution videos.
The photo qualities from the screen grabs are of decent quality and can be shared to social media directly from within the GoPro App.
3- Diving and Underwater Photography
Before considering any underwater adventure, make sure that your GoPro camera is waterproof.
Since the release of Hero5 Black, GoPro has been making waterproof cameras.
You can click here to go through my post on the waterproof specs of all GoPro cameras.
Pre-set your Camera Settings
Before going in the water, make sure you put everything in place since you will have little to no control over your camera when you’re in the water.
I always use 2.7K resolution when shooting in water. I change the digital lens depending on what I will be shooting, continue reading to know which digital lens I use for which situation.
Turn on Screen Lock
After you have all your settings in place, the last thing you would want is the water to mess around the settings.
Turning on the screen lock will prevent this from happening. Swipe the screen from top to bottom then click on the lock icon and activate it.
Once you are in the water, you can always change the mode by pressing the mode button.
Field of View
Depending on what you want to capture underwater, set the preferred angle to do that. You can choose Narrow, Medium, Wide, or SuperWide.
Live Burst for Hero8 Black
When using the Hero8 Black, you have a new option to choose the Live Burst mode.
This mode allows you to capture videos and photos at the same time. 90 photos can be captured within 1.5 seconds.
This is enough to create a short 4K video of you jumping in the ocean.
Do not Forget the Sea Creatures
Being in a different ecosystem, you are bound to come across the hosts some of which may be scary.
To get a good photo and video of sea animals, use the linear digital lens with a 2.7K resolution. This will make them appear bigger enough while corresponding with other details.
Using the wide or superwide lens options will make the animals appear smaller unless you are very close to one of them which is also dangerous.
Whenever you encounter animals like turtles, sharks, and the likes, make sure you remain quiet. Making profound movements will scare them away.
GoPro Accessories to Use Underwater
Aside from the diving suits, you also need to consider getting additional accessories for your GoPro.
Get a Waterproof Housing
If you are a deep diver, I recommend you get a waterproof housing regardless of whether your camera is waterproof or not.
A typical Super Suit waterproof housing will push your depth limit to 60 meters or 196 feet up from 10 meters/33feet that the GoPro camera can manage by itself.
For Underwater Selfies, Get a Selfie Stick
To capture the best selfies underwater, a good selfie stick should allow you to capture your entire body.
I use the El Grande made by GoPro and can extend up to 98 centimeters/38 inches and collapses back to 38cm /15inches.
Set your GoPro digital lens to Wide, the resolution to 2.7K, and color to GoPro.
For the Hero8 Black users, don’t use the media mod anywhere near water because it is not waterproof.
Anti-fog Inserts
You can position these little silica gel bags strategically within the camera housing to prevent fogging.
After you are done with your filming, you can dry out these inserts and use them on your next adventure.
Color-correction Filter
Depending where you are filming from, it can be worth it to filter out some underwater colors. E.g. you can use a red filter if your ocean has bluer watercolor.
GoPro Underwater Care Routine
After filming your diving expeditions, it is always important to clean your camera with fresh water to remove the debris, salt, and dust particles.
For more underwater tips, check this video by Fintastic Films:
4- Using your GoPro to take Selfies
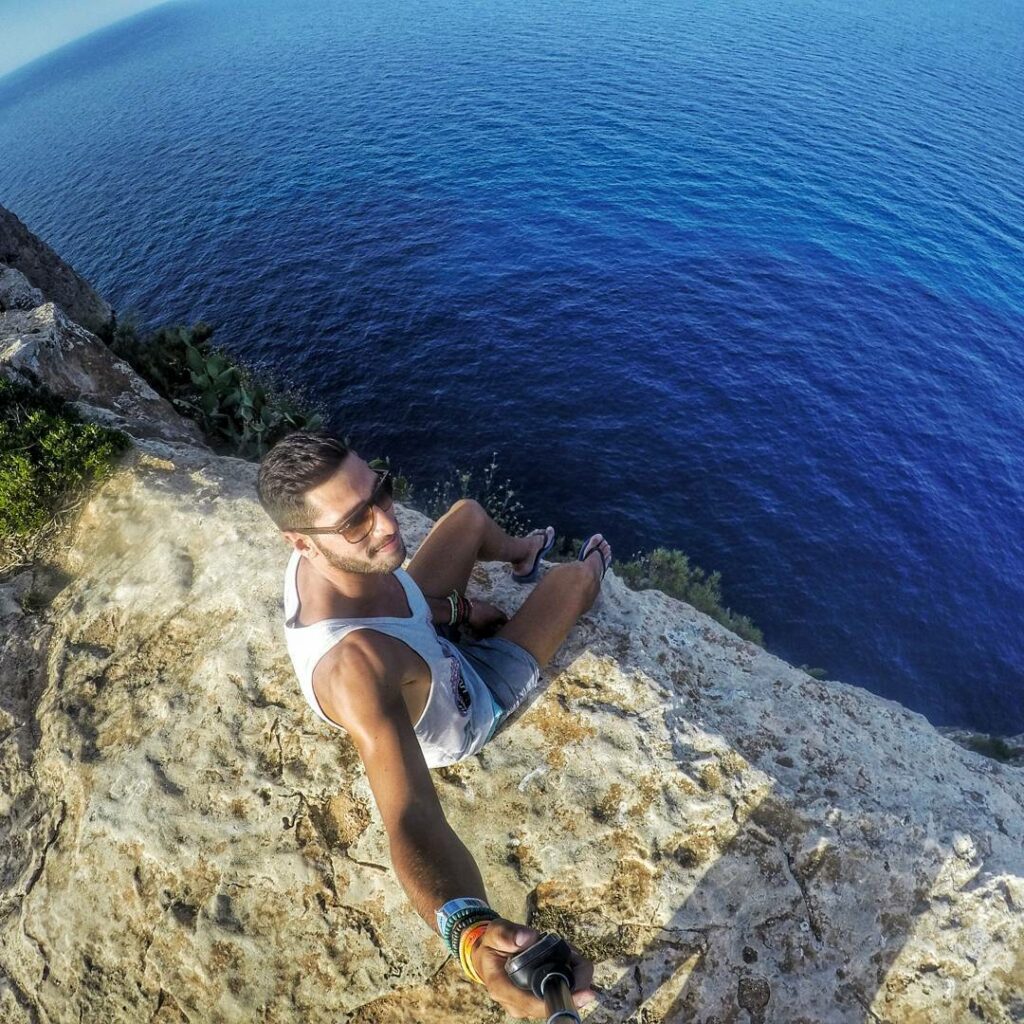
With the advent of front-facing cameras in the smartphone world, it has become very common to take selfies be it with a group or by self.
With a wide angle option in the GoPro cameras, it is also possible to take this kind of photos and videos while capturing a lot of details in the background.
LiveBurst Mode for the Hero8 Black
This cool feature that debuted with the Hero8 Black is so convenient in taking moving and still selfies.
Apart from selfies, you can also use this mode to create stunning jumping and diving shots.
With the LiveBurst mode, you can take 90 photos in a 1.5 seconds interval. This option is also good for people who have trouble with focussing for a selfie shot.
Selfie Audio for Hero8 Black
In a quiet environment like inside your house, the built-in mic in the camera is enough to record your sound and produce a great quality from it.
You don’t need an external microphone here since there are little to no distractions in terms of noise.
Just keep your natural voice while taking the selfie video and GoPro will do the rest to give you stunning footage.
Hero8 Black Video Settings during Selfie Shots
- Resolution: 2.7K
- Frames: 60fps
- ISO: 100 – 800
- Color: GoPro
This combination usually gives me impressive results. I use the 60fps especially while shooting indoors to prevent the wavering of lights.
Lights
Avoid low-light areas because you could get grainy footage. Use external lighting if possible and don’t make it too bright for the eye.
Be Creative with the GoPro App
I always make the GoPro smartphone App my companion everywhere I go with my camera. It is fairly easy to connect the App to your camera.
You can use the App for real-time monitoring and later editing the footage. Sharing to social media is done directly within the App.
5- Using GoPro to take Jumping shots
I prefer using the Hero8 Black to capture my jumping shots,
This is because the camera came with a new feature called the LiveBurst mode. With this mode, you can capture 90 photos in 1.5 seconds. Incredible!
You also get the option to convert your photos into a short 4K video which can be easily shared to social media.
6- Using GoPro for Vlogging
With an action camera, Vlogging is always made easier thanks to its versatility.
Depending on the number of people and background you intend to capture in your Vlogging, adjust the lens field of view appropriately.
The wide-angle view in Hero8 Black is normally enough for me to vlog with another person in the set.
When shooting my vlog in a tranquil place like within my house or inside my car, I use the in-built microphone in the Hero8 Black and it delivers a good job.
GoPro Mounts and Accessories for Vlogging
For an added touch for my Vlogging experience, I use the media mod for Hero8 Black that also gives me the options to add a display and light mods.
The media mod also has a 3.5mm audio jack to attach an external microphone, micro HDMI port, and a directional microphone.
To learn more about the Media Mod, click here to go through my in-depth review.
Using one particular mount all through is very boring and that’s why manufacturers are out there trying to be creative with more options.
I prefer the following mounts from GoPro to spice up my shots:
All these mounts are very helpful in getting shots for your preferred angle of view.
External Microphone
Now, to be honest, the microphone on the Media Mod is not that great and I haven’t seen a difference between the built-in mic on the Media Mod and the mic on the Hero8 Black.
Both produce the same audio quality.
Also, not everyone owns a Hero8, so if you are looking for a clear and enhanced audio quality for your vlogging footage, I advise you to look for an external microphone, see my list of best GoPro external microphones.
7- Using GoPro as your Travel Companion
Using a GoPro camera in your travel adventures can be tricky because scenes and conditions such as lighting can change all the time.
Get in Touch with Locals
When in a new place, you merely know anything about the place. You may end up spending your entire day filming and taking photos of ‘not so interesting’ places.
Planning your trip early is important as it will give you time to do background research on the area and get to know all the good places.
The best way on how you can know this is by contacting a local tour guide to assist you, do not solely depend on the internet for your information.
Mounts and Accessories to Carry Along
If you were to get half of all the available accessories for your GoPro camera, then you will probably go broke.
I always carry with me the following accessories which are more versatile from my experience in using them:
- Bite-Mount – For any GoPro
- Jaws Flex Clamp
- 3-way – Grip, Arm, and Tripod stand
- Curved + Flat Adhesive Mounts
- Additional batteries or a power bank – You don’t want to run out of juice
- Additional memory card – Just in case
What to Do in Low-light Scenes
Adjust the ISO
Whenever I travel at night and intend to grab my GoPro and get a shot or two, I use Protune to adjust the ISO settings in the camera in Protune.
For starters, ISO is a photography language that changes the camera’s sensitivity to light.
Increasing the ISO value of your camera will increase the camera sensitivity to light, however, it may result in grainy photos.
For a balanced result, keep your ISO value at 400; not so high yet not so low.
Use Long Exposure
Use Long Exposure when you’re taking night stills, make sure not to move the camera while doing that.
Long exposure is the shutter speed duration, the longer the exposure, the more light can go in the camera hence resulting in brighter photos.
It is useful when shooting the nice sky, and night lapses.
Film Everything Around you in 360°
Using the GoPro MAX or the Fusion will allow you to get an all-round look within one shot.
This is particularly ideal when you have friends to include in the footage or photo.
Also, you can reframe the footage in the GoPro App and create other videos and photos as well. Using 360° gives you unlimited editing possibilities.
Use TimeWarp 2.0 for Quicker Movements
The Hero8 Black introduced TimeWarp 2.0 which has brought good speeds with more stabilization.
A timewarp or hyperlapse is similar to a time-lapse but the difference is that the GoPro will be on the move and not in a fixed place like the time-lapse.
You can experiment a lot with the TimeWarp feature and you can shoot amazing travel videos.
Check the below video by Jan Klaeui for some tips on how to shoot a TimeWarp with your GoPro:
Explore with Different POVs
With a GoPro camera, you get the versatility to choose a variety of points of view provided you have a good mount.
Navigate through the camera settings to choose your preferred mode and options then place your camera in a unique point, get a shot or two, change the point and repeat.
8- Nature Shots in Daytime
Ensure you have a good mount to make the best out of the nature shots.
One advantage of taking shots during the day is that you do not have to worry about the lighting.
However, always track the direction of light since it always affects how your resulting footage will be.
Create an Impressive Lead-in
When holding the camera, you should keenly follow your lead as they introduce you to a scene. This should be seamless and done naturally.
Field of View
Do not focus on yourself too much, ensure you have an angle wide enough to get a good background coverage.
Use Slow Motion
My favorite camera is the Hero8 Black, and good enough, it has very high frame rates that support super slow-motion videos.
Frame Rates for Slow Motion: I use 120fps and 240fps to get very steady videos in slow motion.
It’s all about the Lighting
Just because it’s daytime, many people just take a shot without any other lighting consideration in mind. Never take photos with your subject directed towards a bright sun.
I usually take my nature shots during sunrise or sunset, the light at these times is ambient and provides the best results.
Match Cuts and Transitions
When done shooting one scene, always ensure that the final visuals match well enough with the starting visuals of your next scene.
In post-editing, you will connect the scenes and if there is a huge mismatch, your video will look bad.
Also, start a new scene in the same manner you ended your preceding scene to allow a smooth transition when connecting the videos in your favorite video editing software.
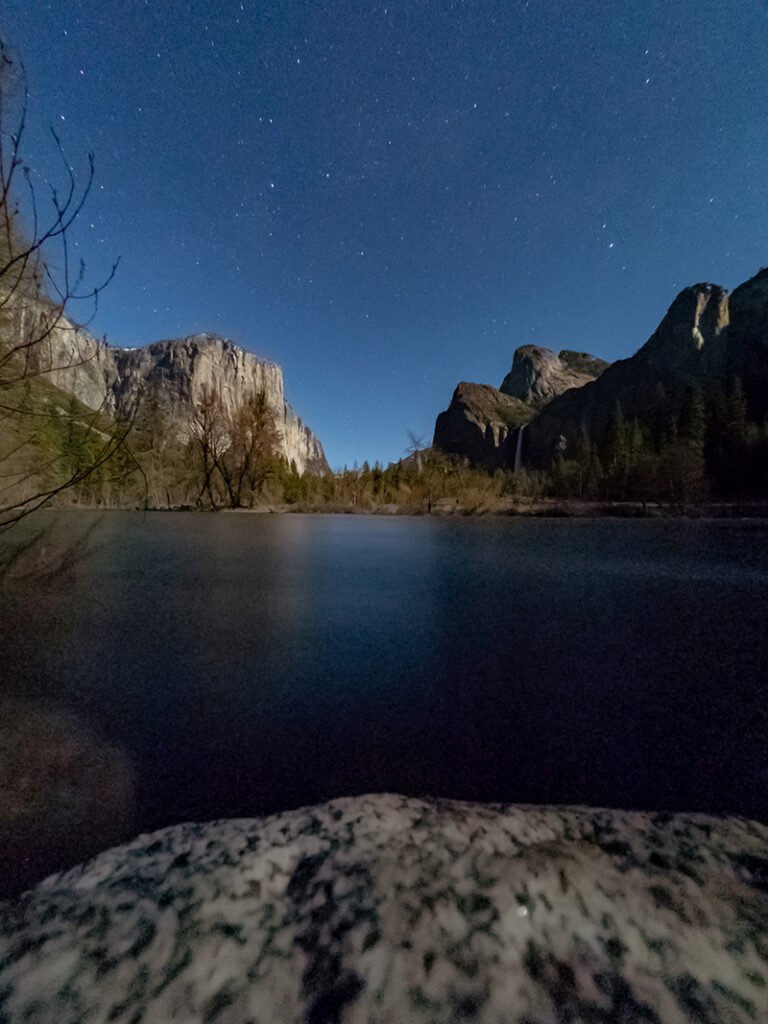
9- Nature Shots in Night-time
Getting shots during the night has never been an easy task, but with the GoPro Hero8 Black or the Hero7 Black, you get good settings to revamp your night photography experience.
The high ISO options will allow you to get brighter photos during both photo and night-lapse mode.
Best Photo Format for Night Photography
I recommend choosing the RAW format in Protune, this will give you photos with a bag of details and more editing options. Photos shot in this mode are saved in .gpr extension.
The RAW format is particularly good in night photography because they capture lots of details with compressing the photos.
However, some details will be lost when setting a high ISO or a long exposure.
Use a Light
It’s very important to take nature shots at night with some light on it.
I use the GoPro Light Mod to shine some light on the subject I am focusing on.
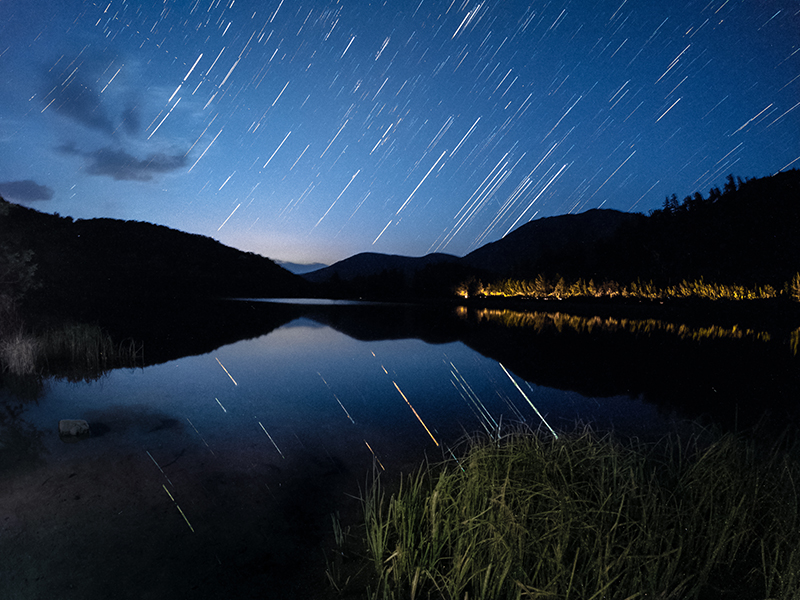
10- Using GoPro to Shoot a Night Lapse
Night Lapse Photo
The Night Lapse mode will allow you to capture many photos at a set interval of between 4 seconds and 60 minutes.
To get into Night Lapse on the Hero8 Black, swipe from right to left on the screen until you see the Time Lapse mode.
Tap on it and select Night Lapse then select your settings after clicking on the pencil icon.
I would use these settings for a night lapse photo:
- Interval: Auto
- Shutter: 30 seconds
- ISO: 1600
- Output: RAW
The photos captured can be compiled into a video during post-production.
Night Lapse Video
For Night Lapse videos, use a resolution of 2.7K with an aspect ratio of 4:3. Upgrading the resolution to 4K will change the aspect ratio to 16:9 which covers up a bit of your sensor.
I would use the following settings for a night lapse video:
- Resolution: 2.7K
- Interval: Auto
- Shutter: 30 seconds
- ISO: 1600
- Output: RAW
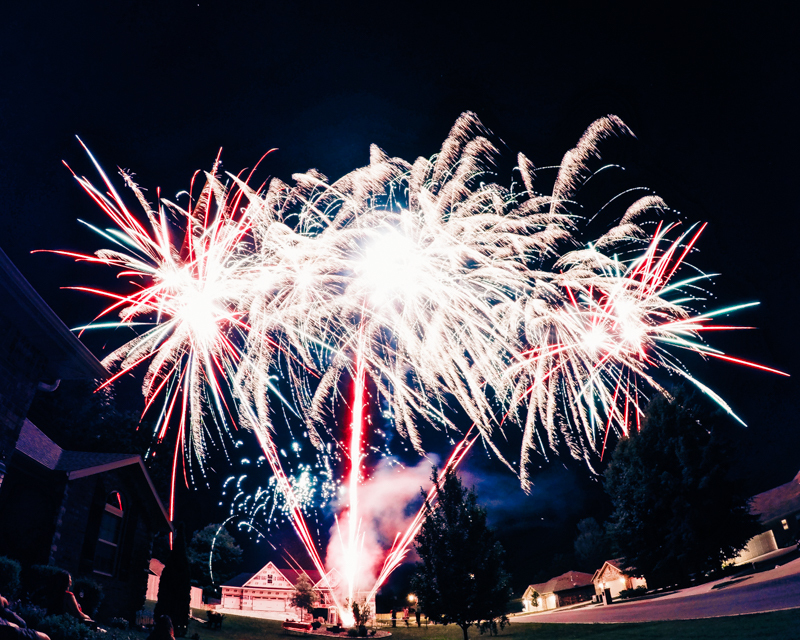
11) Using your GoPro to Shoot Fireworks
Not many people will have a chance to see any fireworks event courtesy of the health pandemic.
However, if it’s the 4th of July and you need to capture amazing fireworks photos, GoPro is your companion here.
Use a Good Mount
Without good mounting, you may end up spoiling your shots. I always use the 3-way mount from GoPro and it always gives me a reason to like it more.
Just make sure your mount is stable enough and that the GoPro is properly mounted.
Set the Correct Camera Settings
Choose the Night Lapse Photo mode and a shutter speed that corresponds to how long the fireworks will last. Between 2 to 10 seconds is always enough.
Other settings can be done depending on your taste and preference. I advise you to try the following settings:
- Interval: Auto
- FOV: Wide
- RAW: On (if the shutter speed is set to 5-second intervals or longer)
- White Balance: 3200K
- ISO Min-Max: 100-800
- Sharpness: Low
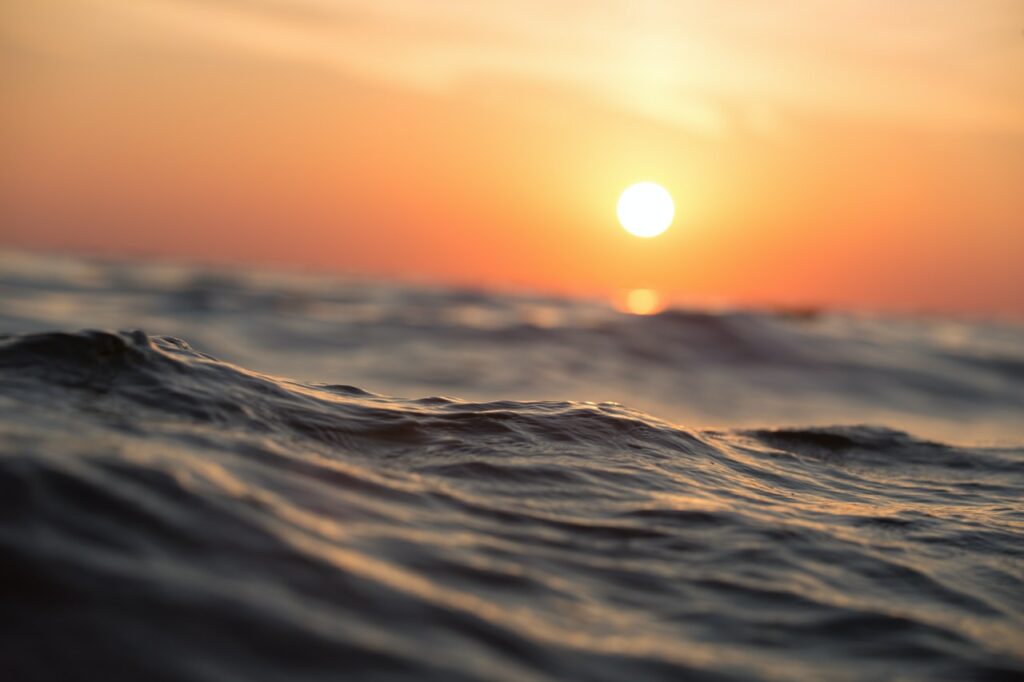
12) Using your GoPro to Capture a Sunset
Capturing sunset photos or videos can be a hard task. The first step is to always identify a good location either plain natural field or a city setting.
For a Time-lapse, Use a Good Mount
I use the 3-way mount for my sunset time-lapse shots. This accessory gives you many mounting options in sunset shooting.
Frame Rates
Choosing frame rates for your sunset shots will depend on how you want your video to appear. I recommend higher frame rates if you need a slow video and that sunset is the only scene you are shooting.
Otherwise, if the sunset is part of another video, you can use lower framerates to get a much faster video.
Shot Settings
Navigate through the Time Lapse night photos in the setting and proceed and choose your preferred settings for that sunrise shoot.
I recommend using the following settings:
- Intervals Min-Max: 5-10 seconds
- ISO Min-Max: 400-800
- White balance: Auto
- Sharpness: Medium
Conclusion
I am sure that the above GoPro tips and tricks will help you take your footage to the next level while also getting value from the money you paid for the camera.
This post is not inclusive of everything you can do with your GoPro, I chose the common struggles beginners and advanced users encounter when trying to start their journey with an action camera.
Stay tuned here for I will be publishing similar posts about other uses and cameras also.
Now, it’s your turn to tell me about your experience with some of the above tricks, did they work well for you? Do you have any suggestions you would like to add?
Feel free to respond by leaving a comment in the comments sections below 🙂

Leave a Reply