I will show you today how to use a GoPro as a dash cam in your car.
You may have noticed lately on some YouTube videos that many people actually use it especially in Russia to record video footage while they’re driving. Many police cars in the US have it as well.

It has a lot of advantages and can be extremely useful in a lot of situations like accidents, road rage and other incidents.
People use the video as a proof to show the authorities what really happened and get out of trouble.
It’s not mandatory to use a dash cam except maybe in some countries, but I highly advise it.
I have a spare GoPro mounted as a dash cam that records continuously while I’m driving.
Why GoPro?
It’s true that GoPro is an extreme sports camera used for surfing, snowboarding and skydiving, but it can also be used for other purposes like a webcam or even a security camera.
It offers high quality video resolutions with a wide shooting angle (the fish-eye effect) and that’s extremely beneficial for recording in a car, no blind spots whatsoever.
I personally love GoPro and I own few models from the Hero4 to Hero8.
If you have a spare one or maybe when you’re not using yours for other activities then you can definitely use it for this setup.
Let me show you my GoPro dash cam hack.
Here’s What You Need: My GoPro Dash Cam Kit..
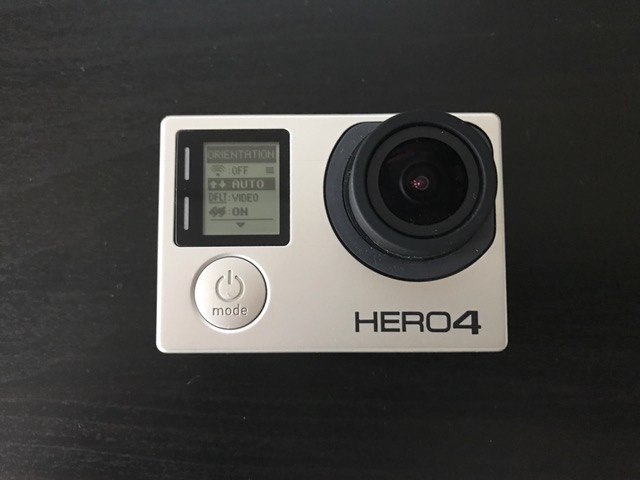
- Your GoPro
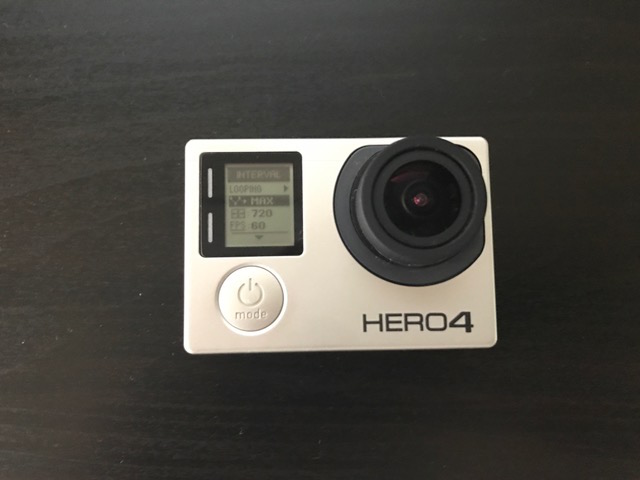
- I use my old GoPro Hero4 Black
- MicroSD Memory card
- I recommend at least a 64GB, I can record around 4h22min with 720p at 60fps.
- GoPro Frame with side access
- This frame gives access to the side ports
- Mini USB to USB cable
- To connect my GoPro to the car charger
- 12V USB car charger
- To keep my GoPro powered and avoid using the battery
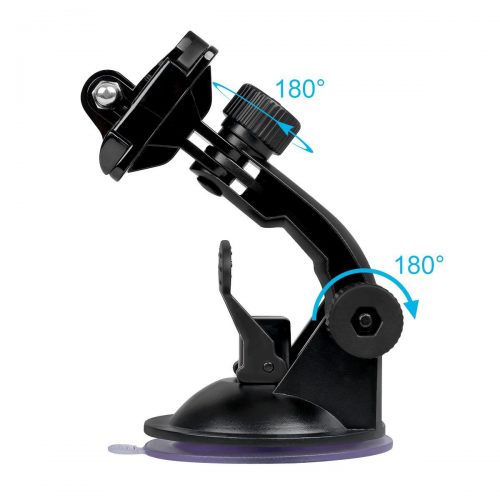
- Suction cup mount for GoPro
- To mount the GoPro to the windshield
Let Me Show You How To Do it
1. Understanding the functionalities
First of all and before mounting the GoPro, we need to make sure that loop recording is enabled.
What is loop recording?
GoPro has this very essential feature integrated in the camera that allows continuous recording.
It basically overwrites the beginning of the video once there is no space left on the memory card.
In my case, if I use a 64GB SD card, I’ll be able to record 4h 22min of video, loop recording will only keep the last 4h22min of my video, all videos before that will be deleted.
What if I want to record for longer?
Both GoPro Hero4 and Hero5 support 128GB SD cards which can record double that time so around 8h44min of video footage.
Some people might find it necessary to record more than 4hours but it’s up to the individual’s choice.
How to enable loop recording on a GoPro?
Loop recording feature offers several interval options, but for a dash cam setting, I need the set the interval to max, that means the GoPro will not start erasing the beginning of the video until the SD card is full.
There are other interval windows such as 5, 10, 30 minutes but it’s useless in this situation. Learn how to enable loop recording here.
Which resolution is the best?
I use 720p at 60fps. 720p is full HD which is enough for dash cam recording also setting higher fps is useless in this situation.
2. Preparing the GoPro: My GoPro Dash Cam Settings..
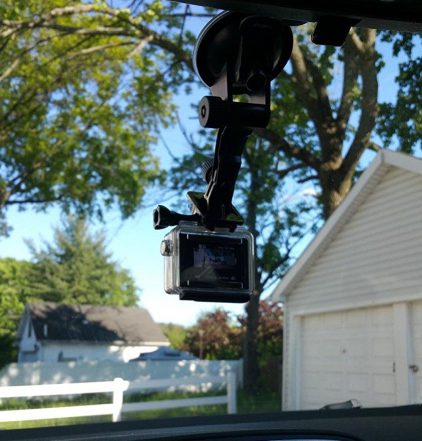
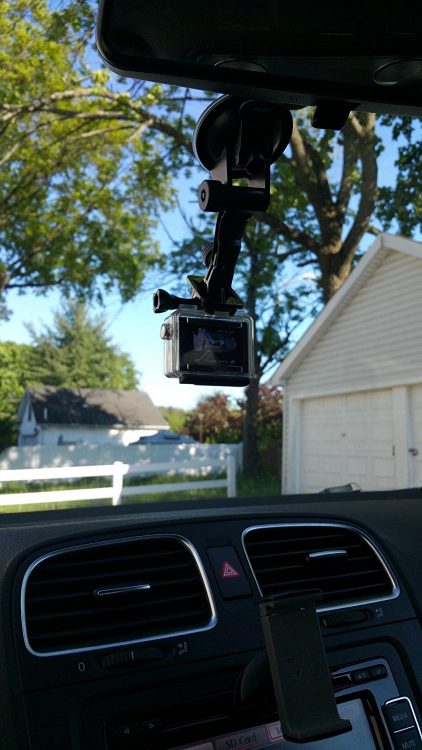
When using a windshield mount, the GoPro will be upside down as shown in the below photo.
That’s fine, don’t worry. GoPro has an additional setting where I can change the orientation (Up, Down or Auto) which is another great feature from GoPro.
So I make sure to set this up prior to mounting the camera.
To change the orientation on your GoPro Hero4, go to ‘Setup’ then orientation (the 2nd line), then choose ‘Auto’.
That way the GoPro will automatically detect if we’re using the camera upside down and will flip the video. The front LCD screen will also flip.
To set up the loop recording on your GoPro Hero4, press the ‘Settings’ button on the side of the camera, select ‘Looping’ then under it, select the interval.
As I mentioned earlier, the interval should be set to ‘MAX’ that way the GoPro will start erasing ONLY when the SD card gets full.
Under the interval, we need to choose the resolution, I choose 720p which I find enough. I then choose 60 for the FPS.
3. Connecting Everything
Now, that the GoPro is set up, we need to connect everything. I’ll start by putting on the frame on the camera then fixing it to the suction cup mount.
Next, would be to fix the suction cup to the windshield. The windshield should be clean from any dust, better to clean it with a cloth first.
I’ll apply some force on the mount then tighten the small release buckle.
I usually try to wiggle the mount a bit to mimic the road vibrations just to check if it’s mounted properly, it’s worth checking before fixing and connecting everything. I don’t want the camera to fall off while I’m driving.
Once it’s stable, I plug in the 12V USB charger in the cigarette lighter socket and connect the USB cable.
I then connect the USB cable to the mini USB port of the GoPro. Once I verify that the GoPro is powered through the charger, I can now click the shutter to start recording.
Another method would be to use the GoPro app on my mobile or the remote to start and stop recording or change any setting I might want to change after mounting the camera.
I recommend to have either the app or the remote connected to the GoPro that way I won’t need to touch the camera and maybe move it by mistake which can ruin the shooting angle.
It’s a pretty straight forward setup, no extra hardware is needed except the suction cup mount. I’m sure everyone already uses a USB car charger for their mobile phones.
Here’s a video of a GoPro as dash cam. I really like the wide angle, no blind spots!
4. Additional Tip
Using a dash cam is great and offers some security for many people and what would be good is to have a GPS tracker connected to the camera.
Imagine having the exact location of an accident or whatever incident that takes place, awesome idea, isn’t it?
Well, the GoPro Hero5 or newer models have GPS capabilities that can to track your movements.
I find it essential to have location information when recording from a dash cam.
I can always go back and track the route I took or use it to identify the location of an incident.
If you have a Hero5, 6, 7 or 8 you can easily activate it, here’s how to do it:
- Swipe down on the GoPro screen and go to ‘Preferences’
- Scroll down to ‘GPS’ and turn it ‘ON’
- Now you will see the little location icon on the left side of your screen, next to the WiFi icon.
GPS gauges can be added to the video later using GoPro’s software ‘Quik‘.
All the GPS data is stored on the camera and then you pick which gauge you like to display using Quik.
It’s pretty cool if you’re planning to edit the video later on.
What about the audio?
For me, audio is as much important as video in a dash cam and can be beneficial in many incidents like car accidents, road rages, etc..
Recording a good quality audio is a plus in this situation, and we know that the GoPro is capable of recording audio but to be honest the quality is not that great.
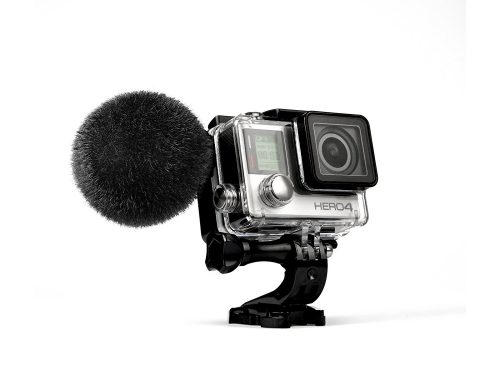
The solution to this was to connect an external mic to my GoPro, this will greatly enhance the sound quality of the recorded videos, it will be a lot more crispier, clearer and wind-noise free.
Of course this is optional, but for anyone looking to upgrade the sound quality of his GoPro should give this a try, you won’t be disappointed.
What are the advantages of using a GoPro over a normal dash cam?
- Cost saving: No need to spend extra money on a new dash cam if you already have a GoPro.
- Quality: Even with a good quality dash cam, a GoPro Hero6 can easily beat it with its 4K video resolution and GPS capability
- Reliability: GoPro is well-known to handle rough conditions and can be pretty reliable especially when using it as a dash cam.
- Functionality: GoPro can be controlled using the GoPro remote or through the app on your mobile which makes it a lot easier to change settings without having to un-mount the camera from the windshield like other dash cams.
What are the disadvantages of using a GoPro over a normal dash cam?
Using a GoPro as a dash cam has its disadvantages as well:
- Overheating: Using a GoPro for an extended period of time when it’s continuously recording and under the sun can make it overheat, even when using a GoPro frame and not the closed case.
- Theft: GoPro are much more expensive than normal dash cams, therefore it can sometimes attract thieves to break in your car and steal it (that is a worst case scenario but you never know).
My suggestion would be to use the windshield sun shades to hide the GoPro and protect it from the heat.
As you can see, there are more advantages than disadvantages of using a GoPro as a dash cam.
It’s up to you to decide whether you use your GoPro or purchase another dedicated camera.
I suggest you keep in mind the above details and decide whether you go with a GoPro or normal dash cam.
That’s it folks! I hope you liked this tutorial. Feel free to share any tips, thoughts or questions you have in the comments section below, and don’t forget to share 🙂


July 16, 2017 at 4:43 pm
Hi Michel, thank you for the guide. I have a GoPro Hero5 Black that I’m not using and thought of using it as a dash cam. I really liked the fact that it has GPS. I got all the required accessories however when I’m recording the camera stops when the SD card is full.
Is there a way to get around this issue? Do I need to replace the SD card every time it’s full? I would really like the camera to record non-stop.
July 16, 2017 at 4:58 pm
Hi Laura, great to hear that my guide was useful in setting up your GoPro Hero5 Black as a dash cam.
I have actually mentioned that point in my post (you might have missed it lol). The trick here is to enable “loop-recording” feature on your Hero5, that way the camera will keep recording and overwriting old footage.
To enable Loop recording on your Hero5 Black, just follow the below steps:
– Go to your Video settings
– Under Video, you will see “Looping”
– Click on it and set the interval to “MAX”
Make sure to use an empty and formatted SD card with minimum of 64GB. Let me know if that works.
Thanks
July 16, 2017 at 5:15 pm
Thanks for the quick reply! I don’t know how I missed it. Anyway, I just enabled “looping” in Video and I’ll give it a try today.
I will ping you in case I face an issue. Thanks again!
July 19, 2017 at 1:09 pm
You’re welcome! Let me know if you still face issues
May 21, 2017 at 10:19 am
I have been thinking about getting a GoPro to use it as a dash cam and the GoPro Hero4 Silver looks like the perfect one for the job, I like that it has a screen at the back and I guess it’s cheaper than the 5 Black. But how much would I expect to pay for the bundle package you describe in this article? I would definitely consider the whole package depending on the total price.
May 21, 2017 at 1:20 pm
I personally use the GoPro Hero4 Silver as a dash cam and I really like the fact that it has a screen at the back which makes it easier to find the right shooting angle when fixing it on the mount instead of using the mobile GoPro app . It also has a very high quality video resolution and not really expensive. If I were you, I would check the prices on Amazon as they always change, but expect to pay around 350$ for the whole kit (GoPro Hero4 Silver + frame + dash cam mount + charger + cables)
May 21, 2017 at 9:17 am
Hi,
Great article on using the Gopro for a dash cam. I think more and more people are using a dash cam these days and I had wondered how to get started with a dash cam.
I think it offers more protection for you when you’re out on the road.
I like the idea of gps in the hero 5 cam. How much is the Hero 5 dash cam with a windshield mount and where is the best place to pick one up?
Thanks,
MItch
May 21, 2017 at 9:36 am
Hi Mitch, indeed dash cams can be really useful for a lot of traffic incidents. Using a GoPro as a dash cam is a plus since it offers a wide shooting angle that covers what normal dash cams can’t.
You were right to choose the GoPro Hero5 as the GPS feature is another added value for your dash cam. The Hero 5 is around 389$ and can be purchased from Amazon.