If you have been looking for ways on how to stream from GoPro, then you have come to the right place!
I will show you below different methods to connect your GoPro to your phone, PC and Mac.
Capture Devices
A capture device is a device that connects your GoPro camera to a computer or a mobile phone and helps convert the camera’s signals into a compatible format for live streaming.
There are separate ports available on GoPro cameras that allow its connection with a variety of devices that run on Windows, Linux, Mac-OS operating systems.
There’s no need for a separate capture device if you just want to transfer or stream videos from your GoPro camera to computer.
However, you may need to have a capture device if you wish to have high quality streaming with no latency and save the videos to your computer.
In the sections below, we will look into ways on how you can stream and capture from your GoPro camera to various devices including Phone, PC and Mac.
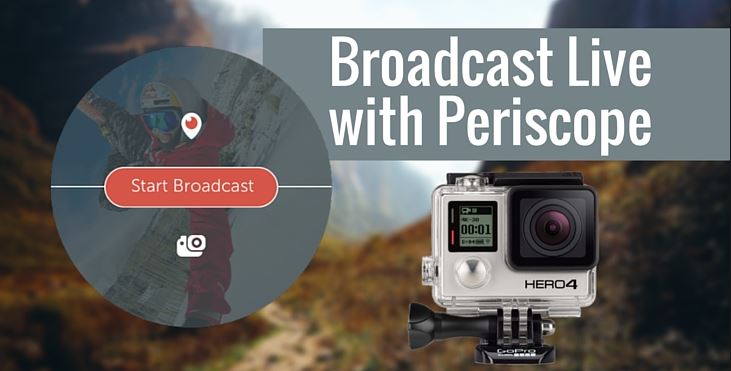
GoPro Live Streaming to Phone with Periscope
If you are an iPhone user then there is some good news for you. As an iPhone user myself, I use Periscope to live stream from my GoPro camera.
The Periscope app is free for download on App Store and it’s being used by over 10 million users who enjoy live streaming from their GoPro cameras.
However, before anything else, you need to establish a connection between the iPhone and the GoPro using Periscope and WiFi.
Follow these steps to start streaming from GoPro to iPhone:
- Turn on your camera, set it to video mode and then enable Wi-Fi.
- Connect your phone to the Wi-Fi network of your GoPro camera, and launch the Periscope app.
- Click the broadcast button that you’ll see at the bottom of the screen. As soon as you do this, a GoPro-inspired icon will pop up that you need to tap on in order to start streaming.
If you want, you can set a name for your Periscope and set up the privacy options. Now you’re ready to enjoy streaming in a normal way.
Once the streaming starts, you can easily switch between the GoPro and your phone’s camera by double-taping on the screen.
You can also use the new lock button that you’ll find on the top of the screen to ensure the streaming doesn’t end once you put the phone in your pocket.
Your camera will save the video so that you can use it later for posting on your preferred social media apps 😉
GoPro Live Stream to YouTube, Facebook, Vimeo & others
Only works with Hero7 Black, Hero8 Black, Hero9 Black, and GoPro MAX.
This guide will enable you to live stream to YouTube, Facebook, Twitch, Vimeo, Workplace from Facebook.
- Download the GoPro App (available for both IOS and Android). This the only way to live stream.
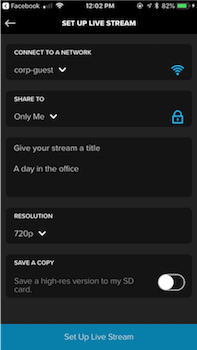
- Open the app and click on Live in preview mode then click “Set Up Live”
- Connect your Facebook account or YouTube account and approve permissions.
- Connect to a WiFi or hotspot
- Under “Share To”, choose the right setting (public , friends or only me). For YouTube, you need to choose “Public”.
- Put a Title and description for the live stream.
- Pick a video resolution. 1080p is only available with the Hero 8 Black.
- Choose whether or not you wish to save the live stream to your micro SD card.
- Check the preview before you start streaming.
- To start the live streaming, you can either click on “Go Live” from the app or simply the GoPro shutter button.
- You can now switch over to Facebook, YouTube or your chosen app to check the stream and the user stats.
Other platforms can work if they are able to provide you with a RTMP or RTMPS URL and a stream name/key (see below photo).
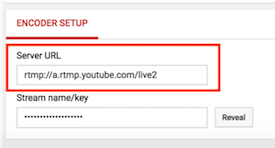
Source: GoPro website
How to Stream from GoPro to PC (Without a capture device) Via WiFi
Only works with Hero 4
- Switch on your GoPro and enable WiFi then Select GoPro App
- On your PC, go to your WiFi settings and connect to the GoPro WiFi (How to reset a GoPro WiFi Password)
- To get the GoPro IP address, open CMD then type “ipconfig” (without the quotes)
- Under “Wireless LAN adapter” look for the default gateway, this will be your GoPro’s IP address. Mine is 10.5.5.9
- Dowload VLC player on your PC and install it
- Open VLC, select “Media” then “Open Media Stream
- Copy and paste the URL: http://xxx:8080/live/amba.m3u8, xxx is your GoPro IP address that we got it earlier.
- Click on “Play”. You will see the video on your VLC player. There will be a 2-3 seconds delay (normal since we’re streaming using wireless connection)
The only way to get a crisp clear streaming video would be by using a capture card. You can also record the videos from your GoPro to PC.
<<<Click here to get more information on how to capture videos from your GoPro>>>
How to Stream and Record videos from GoPro to PC (With a capture device)
If you’re using a capture card then you need to check my other article “How to use a GoPro as a webcam”, you would be able live stream and record your videos on your PC or Mac.
How to Stream from GoPro to Mac (Without a capture device) Via WiFi
The below steps are not user friendly and only work with Hero4, you need to have some programming experience in order to get these right 🙂
Follow these steps for setting up the streaming from GoPro to Mac:
- Install FFmpeg.
- Now, go to the GoPro app on your phone for creating a WiFi name and password. What this will do is establish a connection between the GoPro camera and your Mac over WiFi. (Skip this step if you already have an existing WiFi connection created on your GoPro)
- On your Mac, go to WiFi and connect to your GoPro.
- Now, to enable a continuous stream, download this Python script.
- Go to Utilities and open Terminal
- Copy and paste this inside the terminal – “ffplay udp: //:8554”.
- Copy and paste this to your browser – “http: //10.5.5.9:8080/gp/gpControl/execute?pl=gpStream&cl=restart”.
- To view the stream, go back to the terminal.
Alternatively, you can watch this video:
How to Stream from GoPro to Mac (With a capture device)
This is the easiest and most reliable way for old MACs who wish to use the Thunderbolt port. You can capture full HD videos and save it to your Mac.
If you don’t have a USB 3.0 port on your Mac but you have a Thunderbolt port then here’s what you need:
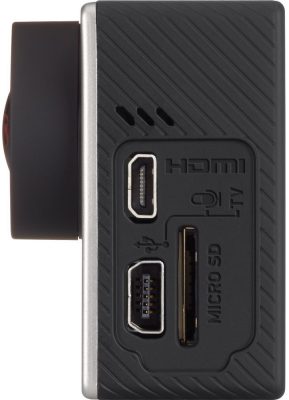
- HDMI to Micro HDMI cable
- Blackmagic Design UltraStudio Mini Recorder – Thunderbolt
- Apple Thunderbolt cable
- Mini USB to USB3.0 cable (For Hero3 and Hero4)
- USB-C to USB3.0 cable (For Hero5)
- OBS Software for MacOS
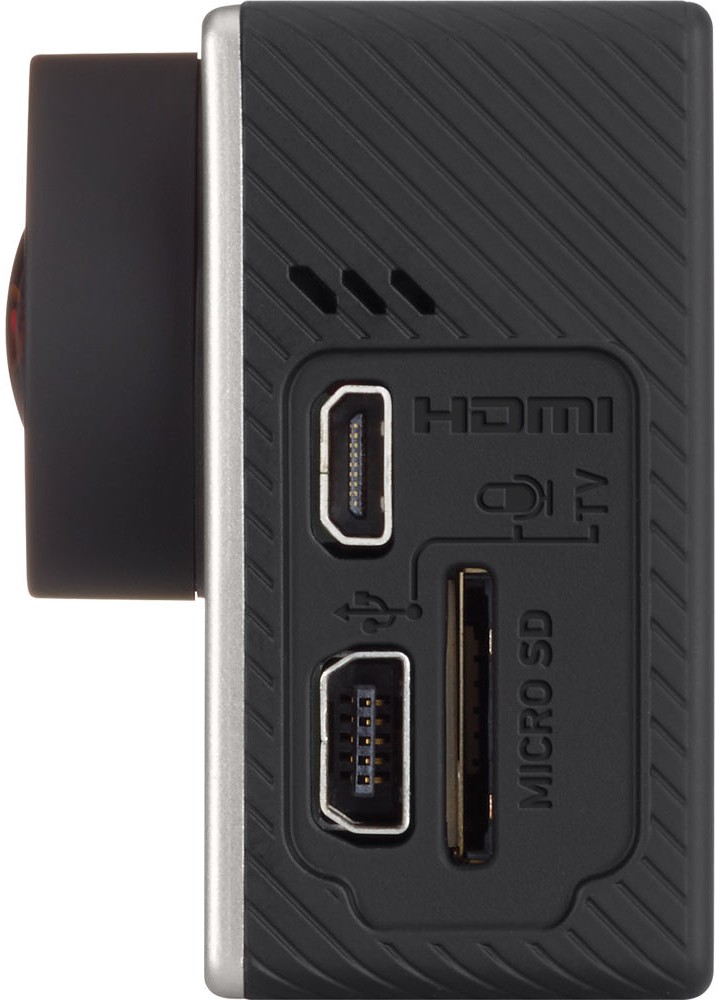
- Connect the microHDMI cable from your GoPro to the HDMI port of the Blackmagic recorder
- For power, connect the GoPro USB cable to the USB port on your MAC. If that doesn’t work then try to plug your GoPro to a USB 5V charger for power.
- Connect the thunderbolt cable from the black magic recorder to your thunderbolt port on your Mac
- Download OBS
- Setup OBS – Open OBS, go down and right Click on “Sources” then Add -> Video Capture Device, You can put the device name “GoPro”. A new window will open, select the device which is the video capture card, then under Video tick “Custom Resolution” and select 1280×720 then for FPS select 30. For Audio, you also have to choose the capture card unless you’re using a mic other than the GoPro’s. Press OK and now you should be able to see the camera preview.
- You’re good to Go!
If you have a USB 3.0 port on your Mac then you can follow the steps HERE.
To Conclude
Your GoPro camera may not be designed for live streaming, nonetheless, it can be used perfectly to stream and capture videos to your phone, PC or Mac.
The nice part of this GoPro is that it can be used like a regular camera for delivering high-resolution videos using just an encoding software and a capture card.
I hope you liked my tutorial, please do not hesitate to leave a comment in the comments section below and I will be more than happy to help! 🙂


April 8, 2020 at 5:38 am
Hi
I can live stream ok using my Hero8 and the GoPro app on my iPhone. my frustration is that I can only stream in the widest format, even though I can record video in narrower framing. Even if I set the GoPro to narrow before I set Live Stream, it reverts to wide.
Can you give me any advice about that?
Thanks
April 8, 2020 at 10:36 am
Hi Russel, this is a limitation from GoPro. When using live stream, it will automatically revert to the widest Field of View, no matter which FOV you choose. Hopefully, they will be able to fix it with a firmware update.
November 15, 2016 at 12:22 am
Thank you for your tutorial. I tried to stream my GoPro Hero Plus to PC via Wifi but didn’t succeed. On VLC, the given URL isn’t working. What may be the reason?
November 15, 2016 at 11:16 am
Hi Johanne, I don’t think it’s possible to stream from a Hero+, only HERO3 and newer. I will check and get back to you. Thanks