If you bought a new GoPro and you’re struggling to make the new micro SD card work, then you might want to check this guide that explains how to format a GoPro SD card.
All GoPro cameras use memory cards called micro SD cards to store the recorded video footage and saved photos. These SD cards are mostly bought separately, or in some instances, are included in a GoPro bundle.

Getting the correct micro SD card for your GoPro camera is essential in the first place and will affect the usability and behavior of your GoPro.
You must format all newly bought SD cards before using them on your GoPro.
Now, not all SD cards are the same and each GoPro camera has different SD card requirements, to know more about this topic, check this article.
I will assume that you are already using the correct micro SD card with your GoPro.
So, to format a GoPro memory card, you can do it directly on your GoPro, your computer, or using the GoPro app. I will show you all three methods.
These methods are applicable on all GoPro models, method #1 differs from one model to another, so it is important to follow the procedure step by step.
Method #1: How to Format a Micro SD card on a GoPro
With this method, you will learn how to format a micro SD card on a GoPro.
Important: Make sure you save all your videos and photos before proceeding with the format procedure. All files will be erased once the format is complete.
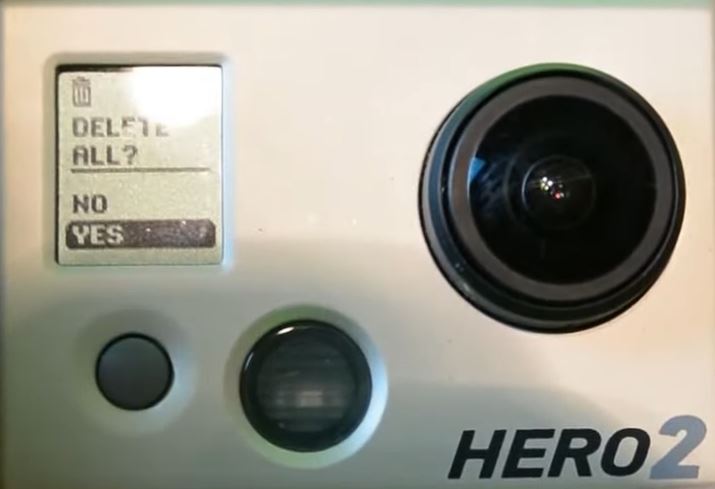
GoPro Hero 2
1- Turn on your GoPro Hero2
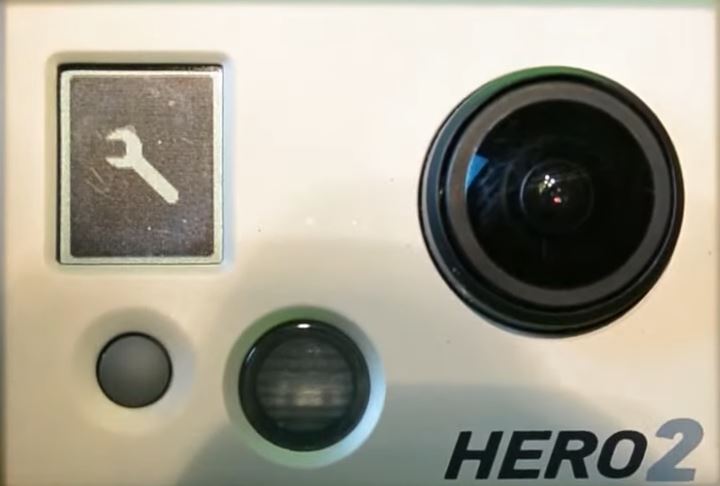
2- Press the front mode button repeatedly until you get to Settings (wrench logo) then click the shutter button to enter.
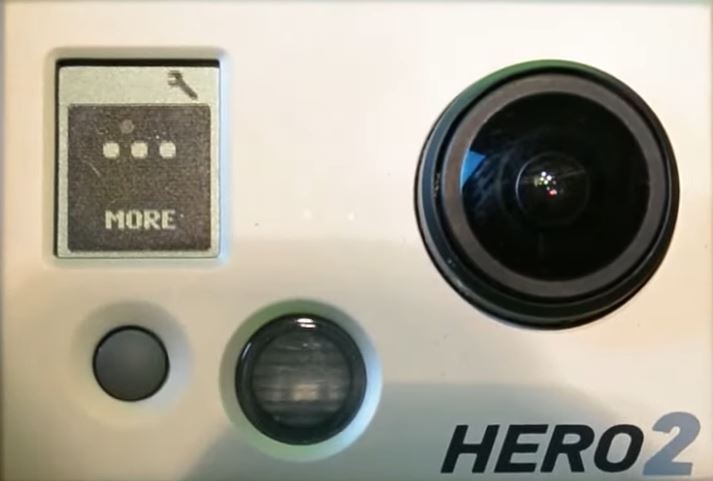
3- Then again, click the Mode button repeatedly until you see ‘More’ then click the shutter button.
4- Now, you will see a Trash can icon, click the Shutter button to select, then press the Mode button to highlight ALL/FORMAT.
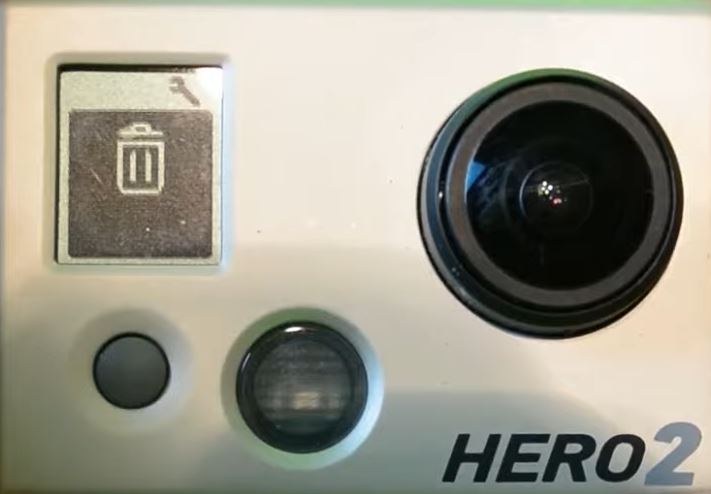
5- Click the Shutter button to select, then select Yes to format your GoPro Hero2 SD card.

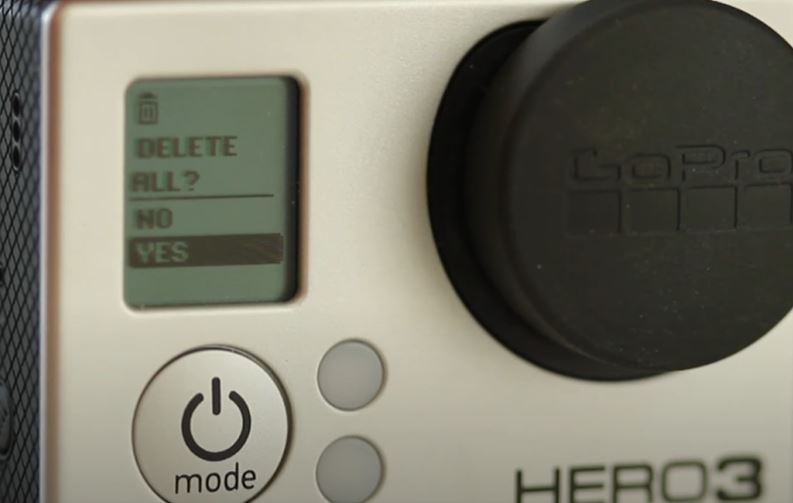
GoPro Hero3 and 3+
The steps are very similar to those of the GoPro Hero2
1- Turn on your GoPro Hero3 or Hero3+
2- Press the Mode button located at the front of the camera repeatedly until you see the Settings icon (wrench) and select it using the shutter button.
3- Now that you are in the Settings menu, press the Mode button again repeatedly until you get to the garbage can icon, then select it using the shutter button.
4- Select ALL/FORMAT from the menu then confirm using the shutter button, then choose Yes to format your GoPro Hero3/3+ SD card.
GoPro Hero+ & Hero+ LCD
1- Turn on your GoPro Hero+ or Hero+ LCD.
2- Press the Mode button located at the front of the camera repeatedly until you see the ‘Settings’ icon (wrench) and select it using the shutter button.
3- Now that you are in the ‘Settings’ menu, press the Mode button again repeatedly until you get to the garbage can icon, then select it using the shutter button.
4- Select ‘ALL/FORMAT’ from the menu then confirm using the shutter button, then choose ‘Yes’ to format your GoPro Hero3/3+ SD card.
GoPro Hero4 Black and Silver
Both cameras have the exact same menu, so same procedure:
1- Turn on your GoPro Hero4 Black or Hero4 Silver.
2- Press the front Mode button repeatedly until you get to ‘Setup’, then click the Shutter button to enter the setup menu.
3- Press the Mode button repeatedly until you get to the trash can icon, then click the Shutter button to select it.
4- Press the Mode button and select the ‘ALL/FORMAT’ option, then select ‘DELETE’ from the menu to format your GoPro Hero4 Black or Hero4 Silver SD card.
GoPro Hero Session & GoPro Hero5 Session
1- Turn on your GoPro Hero Session or Hero5 Session.
2- Press the Menu button located the rear side repeatedly until you get to ‘DELETE FILES’, then press the Shutter button at the top.
3- Press the Shutter button one more time to highlight ‘FORMAT SD’.
4- Press the rear button to select the checkmark, then press the Shutter button to format.
GoPro Hero5 Black, Hero6 Black and GoPro Hero 2018
The GoPro Hero5 Black, Hero6 Black, and Hero 2018 have the exact same procedure to format the SD card.
1- Turn on your GoPro Hero5 Black, GoPro Hero6 Black, or Hero 2018.
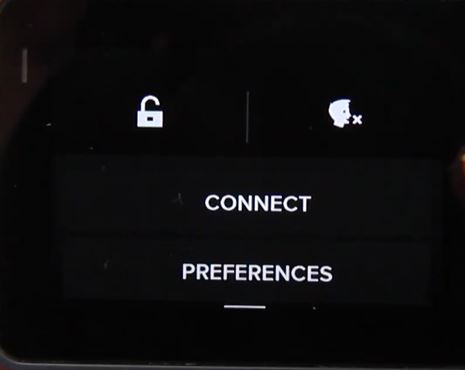
2- Swipe down on the touchscreen and tap on Preferences.
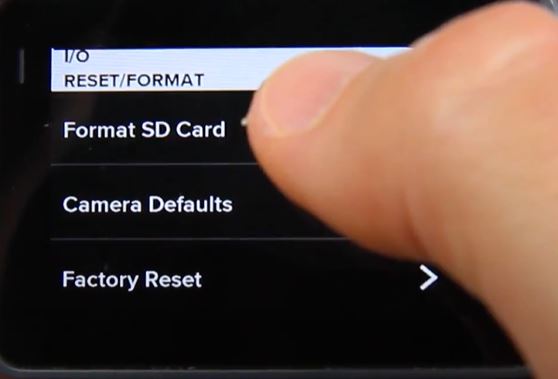
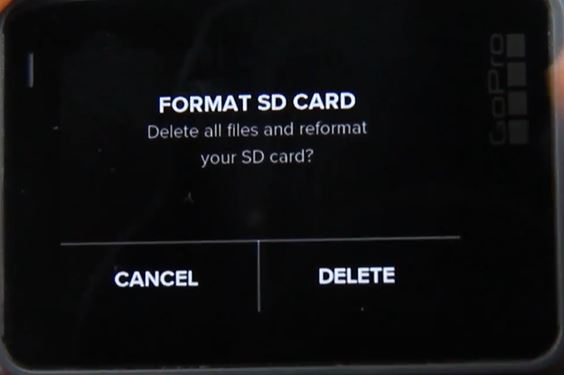
3- Scroll down the menu using your finger until you get to ‘Format SD Card’, then tap on it.
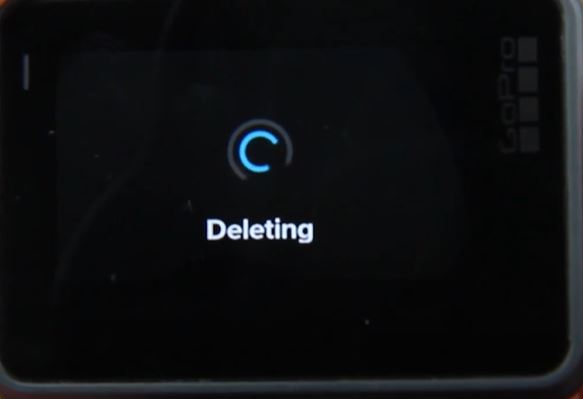
4- When asked if you want to delete all your files and reformat, select ‘DELETE’ to format your GoPro Hero5 Black, Hero6 Black, or Hero 2018 SD card.
GoPro Hero7 Black, Hero7 Silver & Hero7 White
1- Turn on your GoPro Hero7 Black, Hero7 Silver, or Hero7 White.
2- Swipe down from the top of the touchscreen and select ‘Preferences’.
3- Scroll down using your finger until you get to ‘Reset’, then select it.
4- Select ‘Format SD Card’, then select ‘Format’ to format your GoPro Hero7 SD card.
GoPro Fusion
The GoPro Fusion takes two micro SD cards, each lens will record on one SD card.
1- Turn your GoPro Fusion.
2- Press the Mode button located on the side repeatedly until you get to ‘Settings’ (wrench icon), then press the Shutter button to enter the settings menu.
3- Press the shutter button five times to open the Preferences menu (it has a gear icon).
4- Press the Mode button repeatedly until ‘FORMAT’ is highlighted, then press the shutter button to enter the format menu.
5- Now select ‘BOTH’ to format both SD cards on your GoPro Fusion.
GoPro MAX
1- Turn on your GoPro MAX.
2- Swipe down from the top of the touchscreen and select ‘Preferences’.
3- Scroll down using your finger until you get to ‘Reset’, then select it.
4- Select ‘Format SD Card’, then select ‘Format’ to format your GoPro Max SD card.
GoPro Hero8 Black
1- Turn on your GoPro Hero8 Black.
2- Swipe down from the top of the touchscreen and select ‘Preferences’.
3- Scroll down using your finger until you get to ‘Reset’, then select it.
4- Select ‘Format SD Card’, then select ‘Format’ to format your GoPro Max SD card.
GoPro Hero9 Black
- Insert the microSD card in the slot.
- Switch ON your GoPro Hero9 Black action camera by pressing the shutter button or using voice command.
- Go to the rear display and swipe down from the top of the touch-screen.
- Single-tap on the ‘Preference’ selection.
- Choose the ‘Reset’ option. Click ‘Format SD card’ and select format to proceed with the process.
Method #2: How to Format a GoPro SD card with the GoPro app
To format the GoPro SD card with the GoPro app, make sure you download the GoPro app on your phone.
1- Turn on your GoPro.
2- If you haven’t done so already, pair your GoPro with the GoPro app on your phone.
3- Now that the GoPro is paired, on your GoPro app, go to ‘Settings’ by tapping the wrench icon.
4- Scroll down until you see the DELETE menu. Under that menu, you will see two options, select ‘Delete All Files from SD Card’.
5- Then select ‘Delete all files’ to format your GoPro SD card.
Method #3 – How to Format a GoPro SD card using a Computer
For this method, you need a micro SD card adapter and reader. If you don’t have a micro SD card reader on your laptop or desktop, you can order an external SD card reader.
This method is will fix the SD card error that you might get sometimes on your GoPro. Just make sure you are using the correct SD card.
Before we start, make sure you backup your videos and photos.
1- Insert the micro SD card in the micro SD adapter then plug the adapter to the SD card reader and hook it to the USB port on your computer.
2- Save all your videos and photos by copying them from the SD card to your computer.
Now that everything is backed up, here’s how to format a micro SD card using a computer, I will show you how to do it on both Windows and MAC OS.
How to Format a GoPro SD Card on Windows:
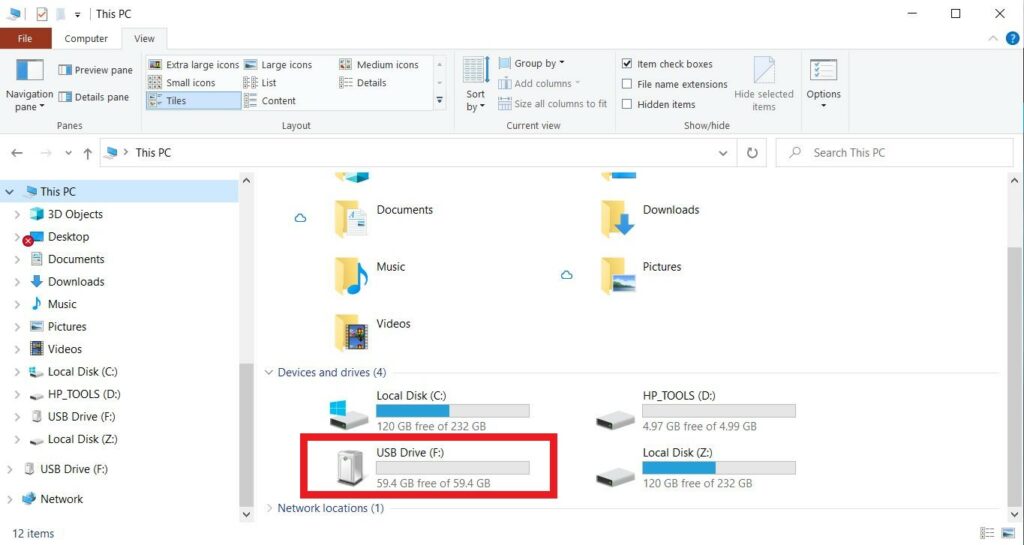
1- Open ‘Computer’ or ‘MyPC’.
2- Under ‘Devices with Removable Storage’ or ‘Devices and drives’, you will see your SD card.
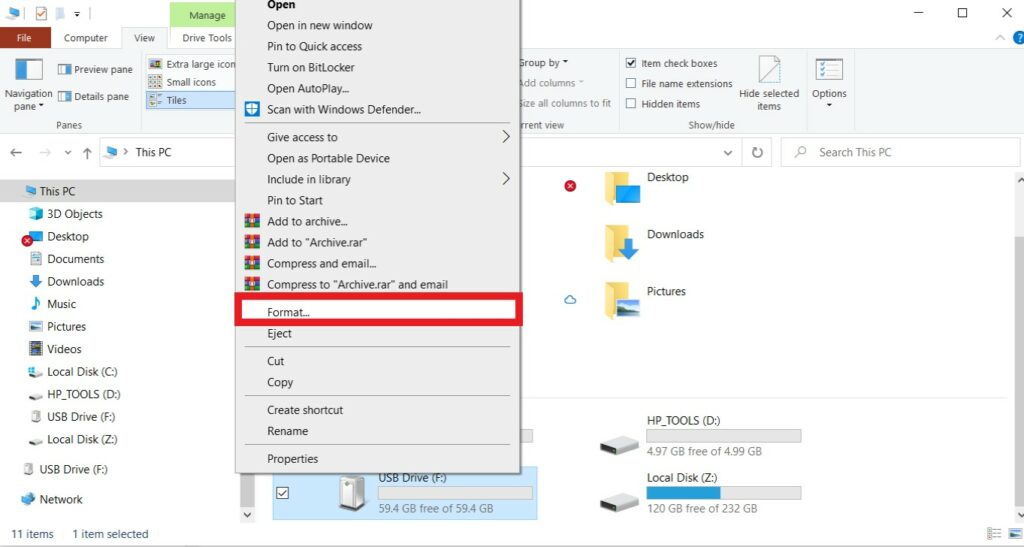
3- Right click on your SD card drive and click on ‘Format’.
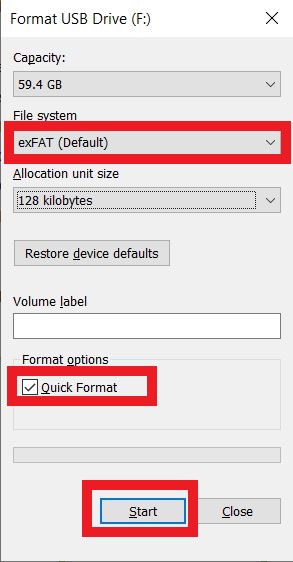
4- In the format window, make sure you choose FAT32 for 32GB SD cards or less, and exFAT for 64GB and above. My SD card is 64GB so I choose exFAT.
5- Make sure ‘Quick Format’ is ticked, then just click ‘Start’, the format will only take seconds.
How to Format a GoPro SD Card on MAC OS:
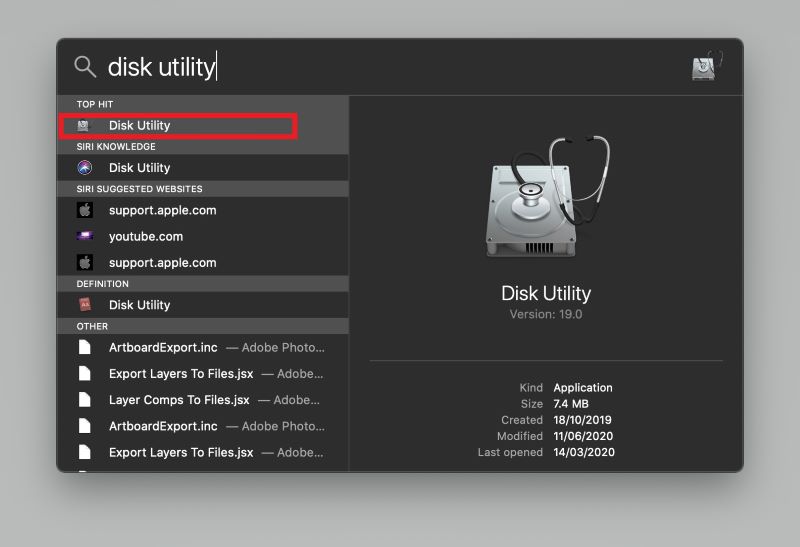
1- Open Disk Utility by opening the search box then typing “disk utility”. Hit enter to open the app.
2- In Disk Utility, on the left side and under ‘External’, you will see the SD card. It will probably be named something like UNTITLED or you won’t see any name like the screenshot below.

3- Click on the drive, then click on ‘Erase’ at the top middle.
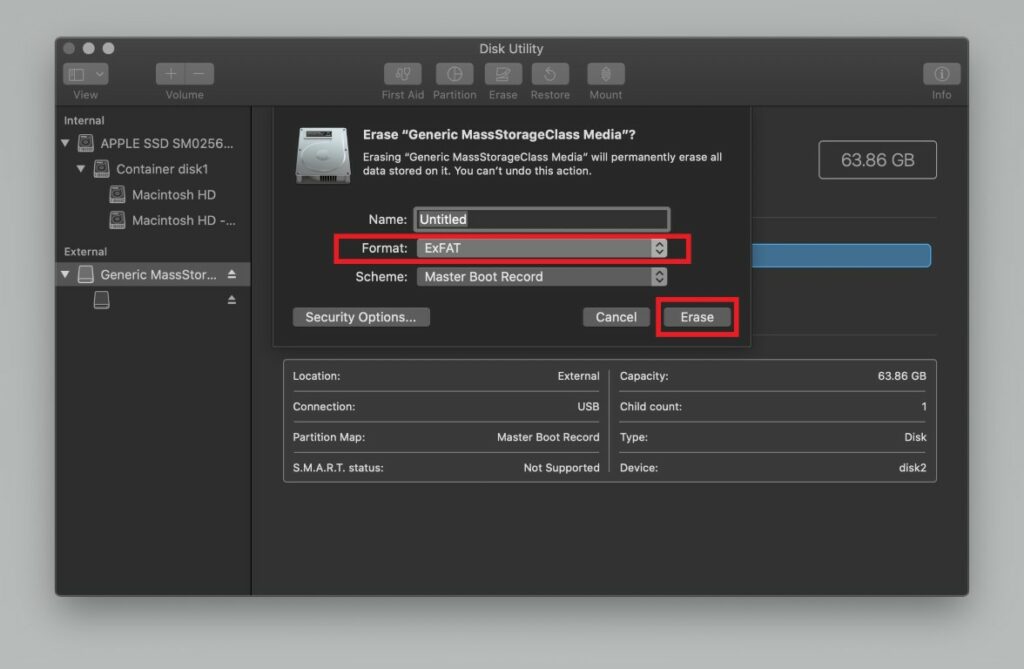
4- Click on the ‘Format’ drop down menu and select ‘ExFAT’, only if your SD card is 64GB and above. If you have a 32GB or below, choose MS-DOS (FAT).
5- Click ‘ERASE’ to format your SD card.
There you have it, Folks!
Now that you know how to format a micro SD on your GoPro, you can choose any of those three methods to format your SD card.
Just follow the procedures step by step and you should be able to do it in no time.
If you face any issues while trying the above methods, please let me know by leaving a comment below and I will be more than happy to help you. 🙂


Leave a Reply